Neon Trigger Devlog #2: How to create a interactable 3D UI Element in unity
Hey everyone, welcome to our third Devlog for 'Neon Trigger'. My name is Aidan, and I am our team's UI and Gameplay Programmer. Today, I will go through how I implemented our shop menu to show off the 3d models of our guns in the shop menu. To do this, we are going to set up a render texture that takes the output of the camera and displays it onto a raw image object in our canvas. While you can set up a render texture manually, I chose to make it expandable and do almost everything through the script, so if we added new guns, I wouldn't have to physically add them myself.
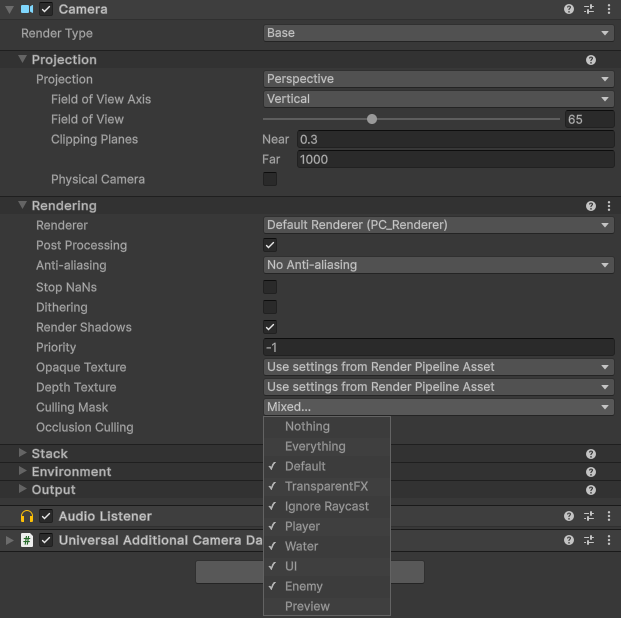
The first thing we want to do is spawn the object we want to display. We want to ensure that the object spawns far away from the player so the player cannot interact with or see this object. To do this, we make the spawn position -9999,0,0 in this example, but feel free to use any coordinates your player cannot access. We can also change the layer of these objects, and then change what layers the player's cameras can see to ensure it's not visible in the distance. We can do this by changing the Culling Mask settings to exclude the Preview layer. The last thing this script does is to call the next method, while you can do this all in one method, I found it cleaner to separate it into different methods.

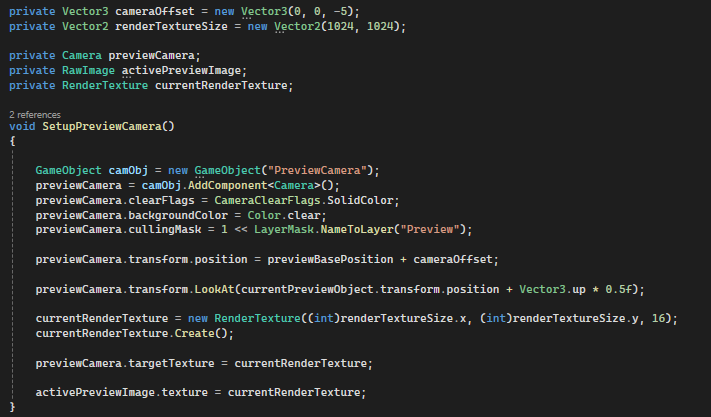
Now we need to set up the camera and its render texture to be displayed on the RawImage wherever we want to display our 3D object. The first thing we do is spawn the camera and make sure that it can only see the Preview layer so that we are only rendering our Preview objects, and to make sure we have a clear background with nothing else in it. We then want to move the camera to be in front of the object we previously spawned and to ensure it's properly looking at the object as well. For our project, we decided about 5 units in front of the object was a good distance, but experiment in your project and pick any number you think looks good. We then need to create the render texture, assign it to the camera and RawImage so that what the camera sees is what is displayed on the RawImage.
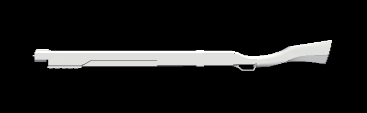
Now you will have your object displayed on the canvas, something like this, while it looks fine, it would be a lot better if the player could see all sides of the gun since it is a 3d object after all.
To do this, we want to take input from the player clicking and dragging on the RawImage that is showing the object. We can do this by attaching this script to the RawImage. This script records when the player clicks and how much they drag the RawImage to see how much the gun should rotate, and then sends that Data to the script that spawned the GameObject being displayed, in my case, it's the ShopMenu script.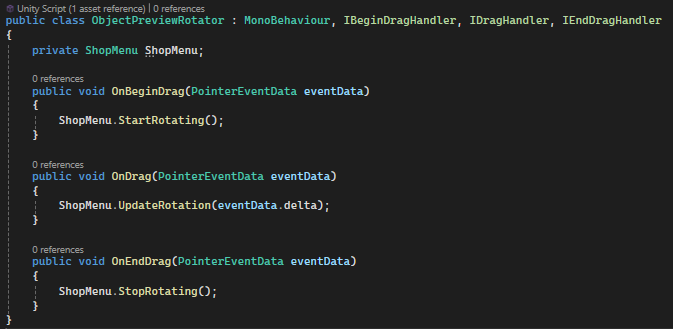
In our other script, we need to create methods to process this data so that we know when the player is trying to rotate the object and how fast they are trying to rotate it. We also don't want the gun to rotate instantly, so we want it to accelerate and decelerate. Feel free to adjust the values to your liking, but in our case, these acceleration and deceleration values lead to a clean rotating feel.

Video of the final showcase
Leave a comment
Log in with itch.io to leave a comment.